Configuration
Overview
This tutorial is designed to help the user build an introductory configuration skillet. The tutorial will showcase PanHandler, along with several SkilletBuilder tools that assist the user in creating, editing, and testing skillets. The configuration tutorial will create a simple configuration including:
An IP External Dynamic List (EDL) object
A Tag object
Security rules (Inbound and Outbound) referencing the EDL and tag objects
The video provides an end-to-end perspective for building a configuration skillet as a complement to the documentation content.
Click below to jump to a specific section of the tutorial:
Prerequisites
Before moving forward with the tutorial, you will need the following:
NGFW up and running with proper access to GUI and CLI(via SSH)
A GitHub account with access permissions to edit repository content
Please refer to the GitHub page for more info on setting up a repository and importing Skillets into PanHandler.
Docker desktop installed and running on your local machine
For users interested in working through the browser GUI, have PanHandler installed and running on your local machine.
For users interested in working through the command line, have SLI installed on your local machine
SLI is a CLI interface for interacting with Skillets. Please refer to the link above to learn about SLI and get started.
It may also be useful to review the following topics before getting started:
Build the Skillet
Create the Configuration in the NGFW
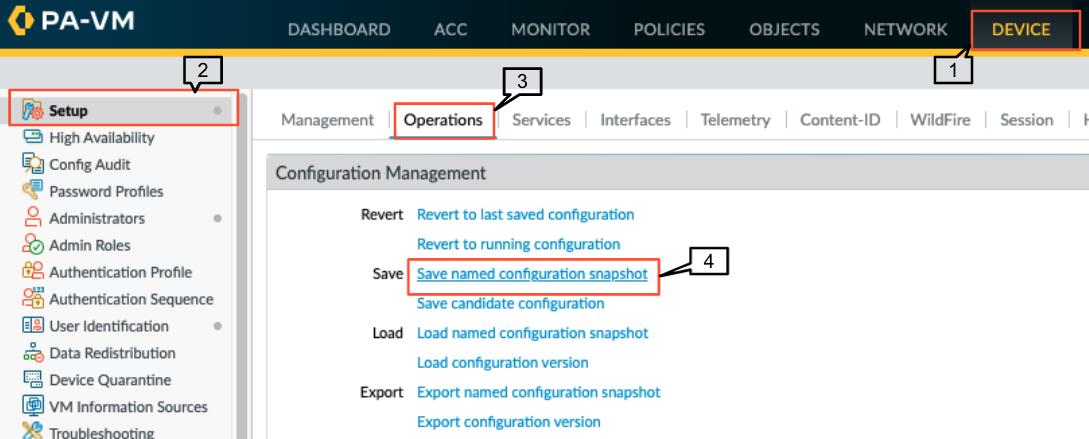
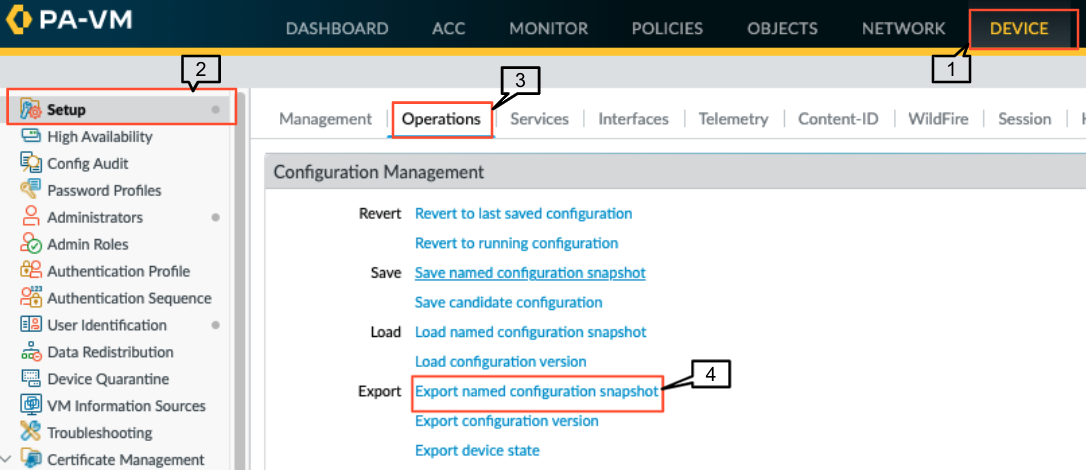
Before modifying the configuration, ensure you have a snapshot of the ‘before/baseline’ configuration of your configuration saved. We will use this saved snapshot to perform an offline configuration difference later.
Navigate to Device > Setup > Operations.

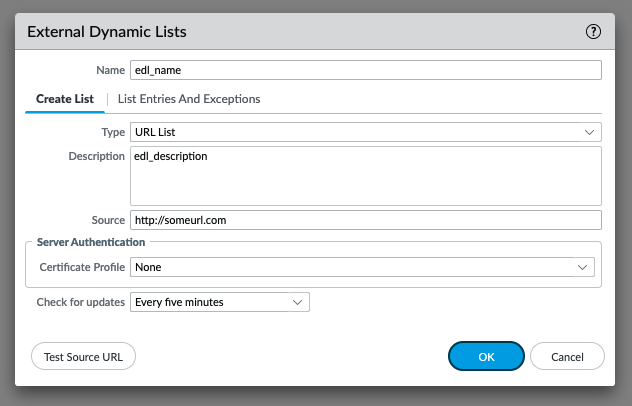
Navigate to Objects > External Dynamic Lists Click ‘Add’ at the bottom of the page
Configure the external-list object with a name, description, and source URL.
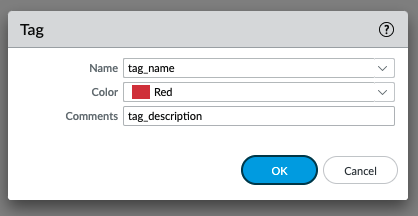
Configure the tag object with a name, color, and comments (description).
Tip
The skillet will only add a single tag to the configuration. However, the GUI shows a color name while the XML data in the NGFW is based on a color number. The use of multiple tag entries is used to extract the color values. So note that in some cases the GUI and XML can use different values and we can use sample configs like this to discover those values.
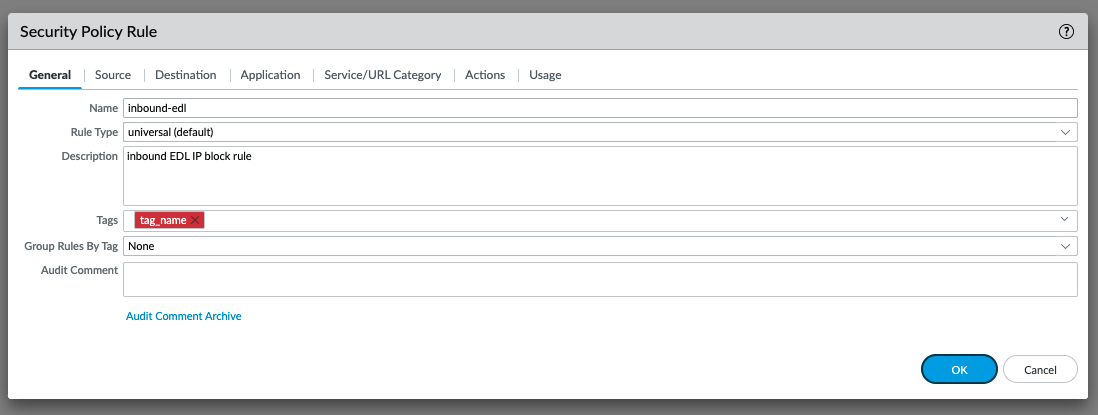
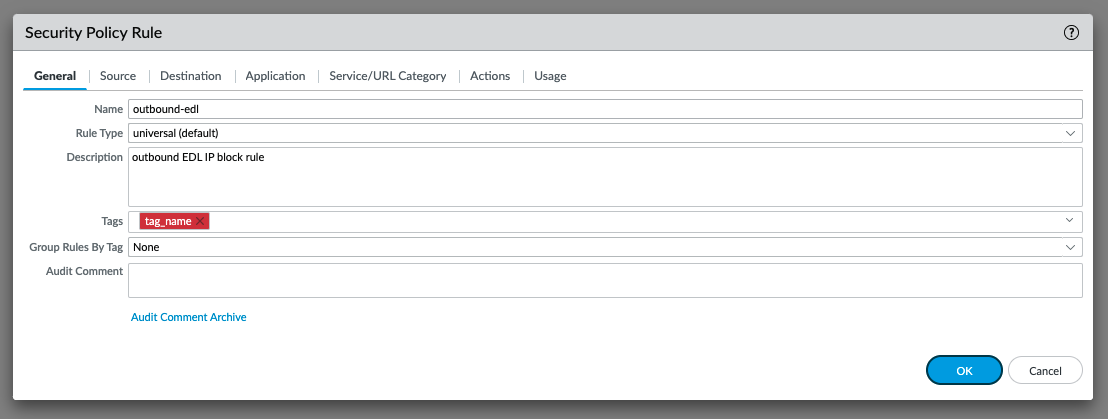
Navigate to Policies > Security Click ‘Add’ at the bottom of the page
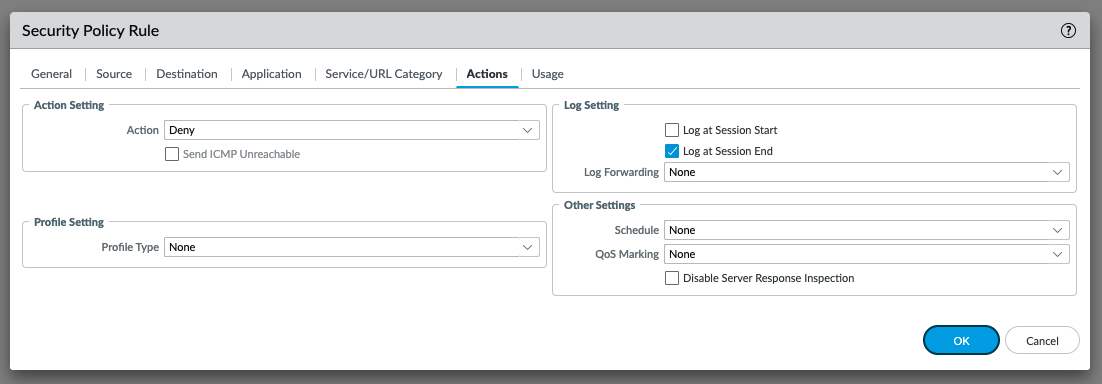
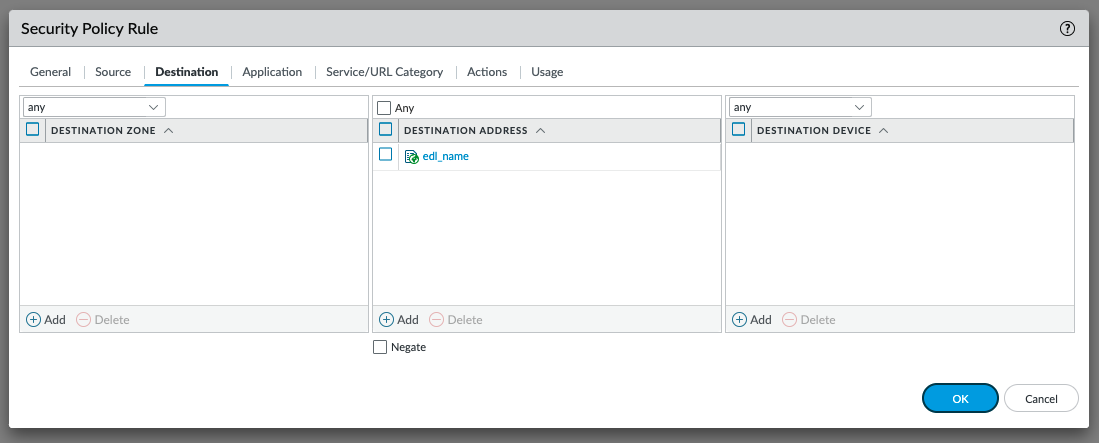
Follow the screenshots below to edit the security policy rules. You can assume the default settings if they are not present below.
Inbound Security Policy [show/hide screenshots]
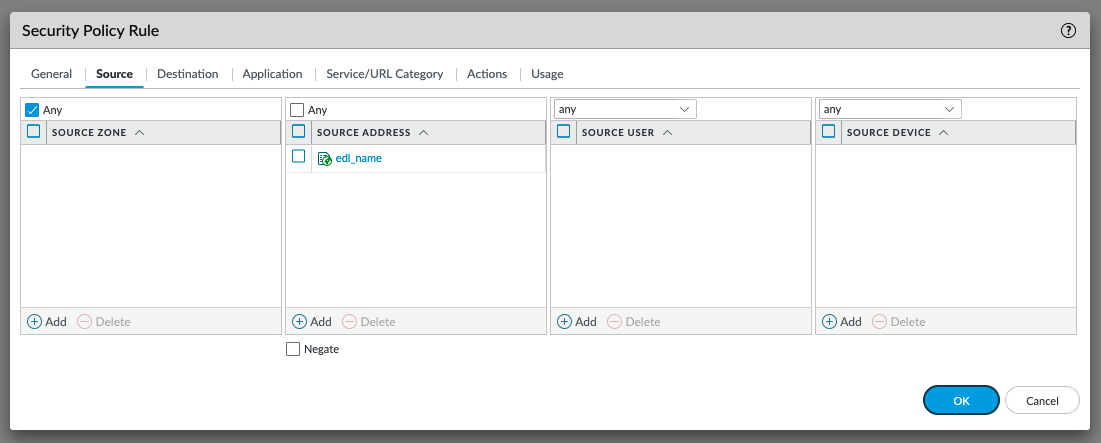
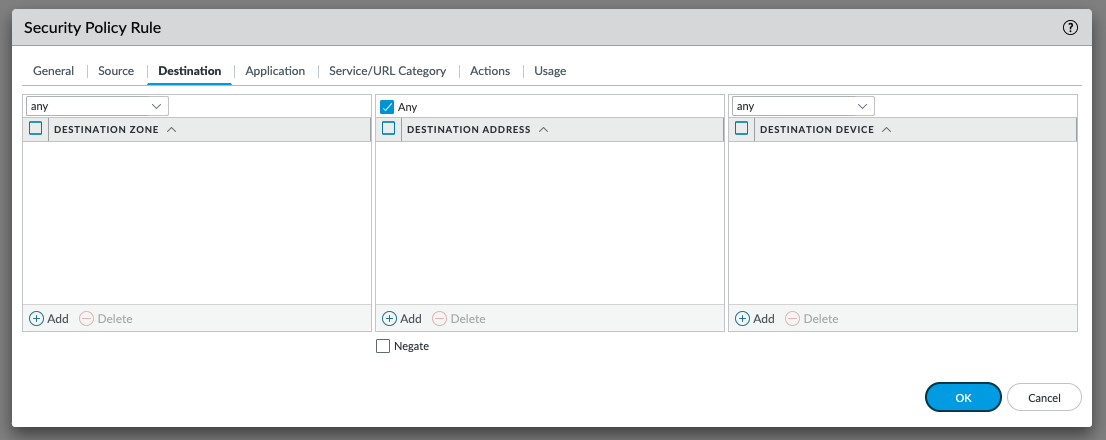
Outbound Security Policy [show/hide screenshots]


Commit the changes you just made and save the configuration file. Navigate back to Device > Setup > Operations and ‘Save named configuration snapshot’ again, but name the file something you will remember (ex. skilletbuilder.xml).
Export both the ‘baseline’ configuration file and the file you just saved to your local machine.
Generate the Skillet from Uploaded Files [Offline Mode]
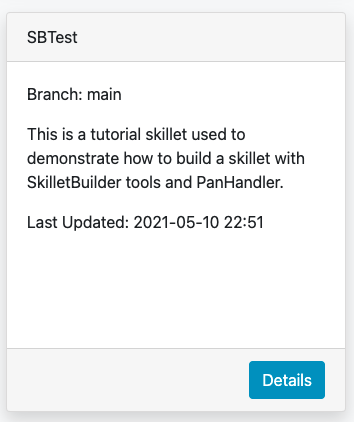
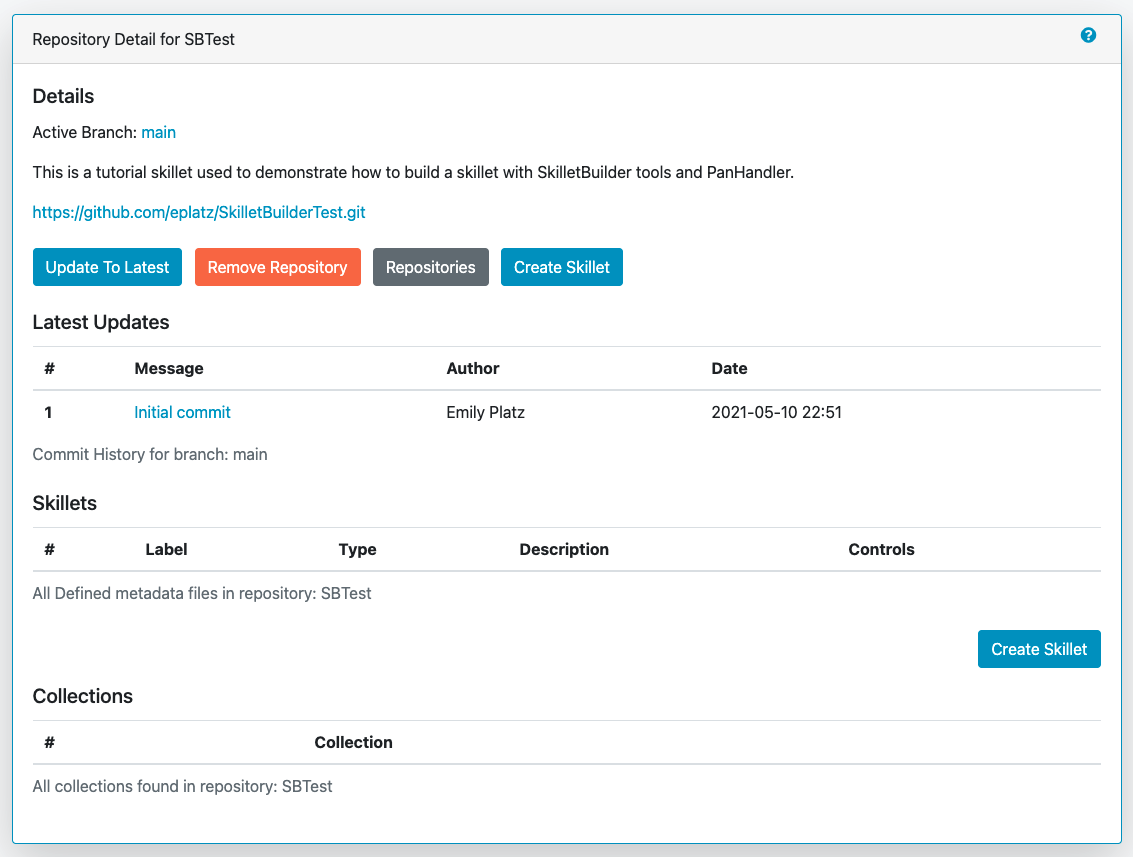
In the PanHandler dropdown menu, click ‘Skillet Repositories’ and locate the skillet repository that you imported in an above step. Click ‘Details’.
Click either of the ‘Create Skillet’ buttons on the page.
Locate the section ‘Generate From Uploaded Files’ and Click ‘Upload’.
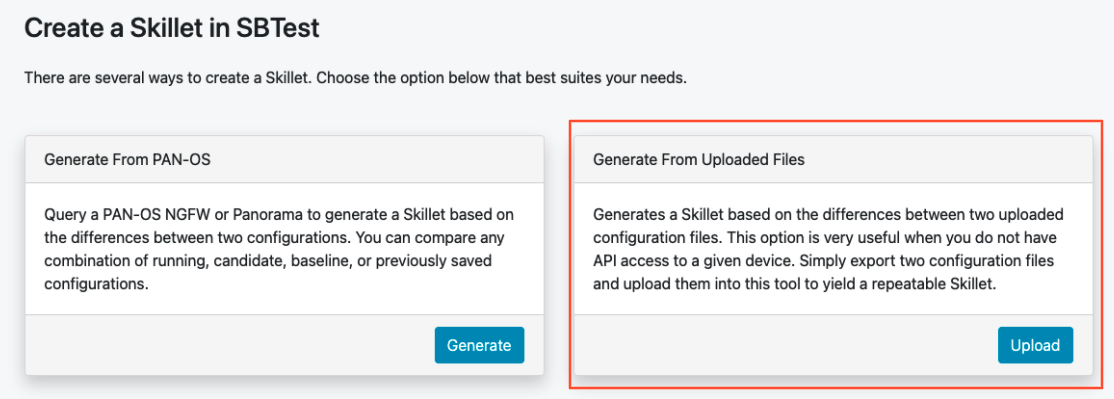
Recall the two configuration files that you exported in an above step. Upload the ‘baseline’ or pre-configuration file in the pre-configuration section. Upload the post-configuration file in the section below. Click ‘Submit’.

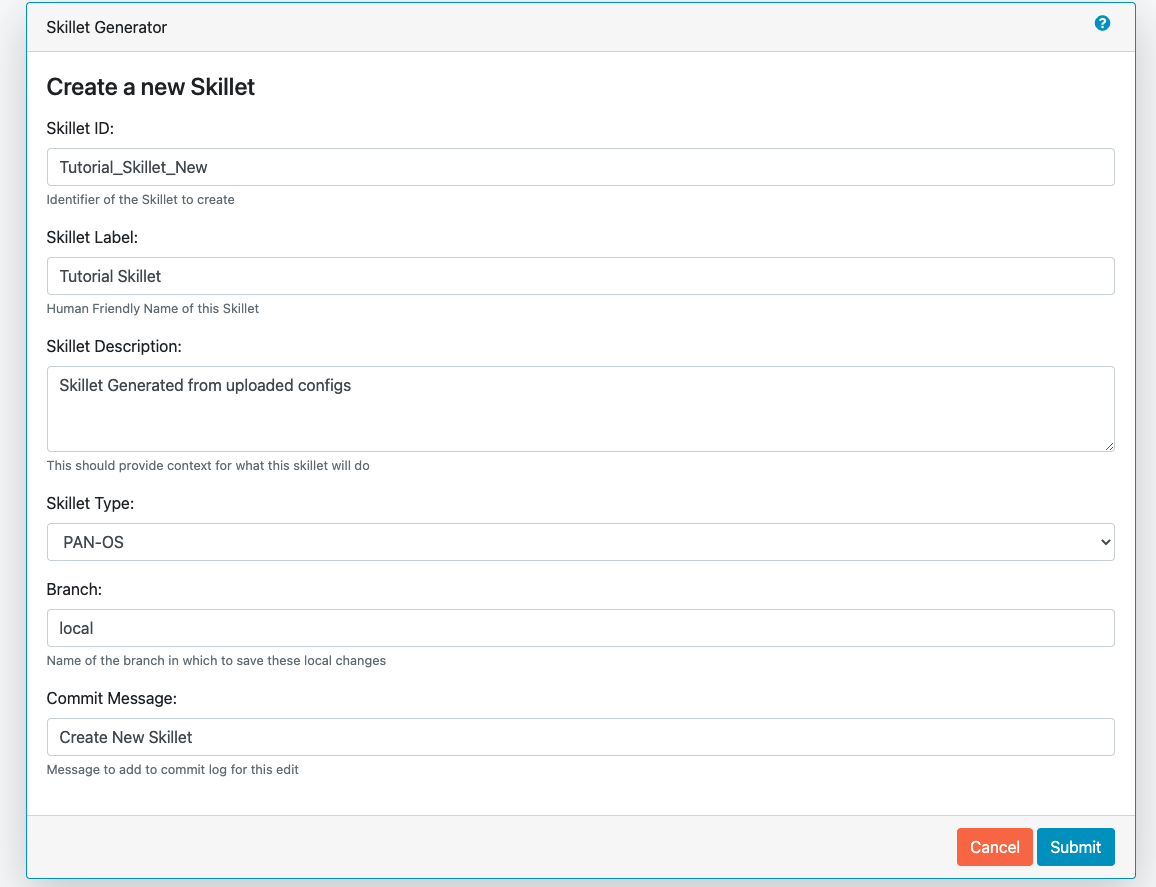
Edit the Initial Config Settings for the Skillet. Here are some suggested inputs for this tutorial:
Skillet ID [must be unique]: Tutorial_Skillet_New
Skillet Label: Tutorial Skillet
Skillet Description: Skillet generated from uploaded files/configs
Skillet Type: PAN-OS
Branch: local
Commit Message: Create New Skillet
To continue on with the tutorial click to go to the next section: Add Variables to Snippets
Generate the Skillet from PAN-OS [Online Mode]
In the PanHandler dropdown menu, click ‘Skillet Repositories’ and locate the skillet repository that you imported in an above step. Click ‘Details’.
Click either of the ‘Create Skillet’ buttons on the page.
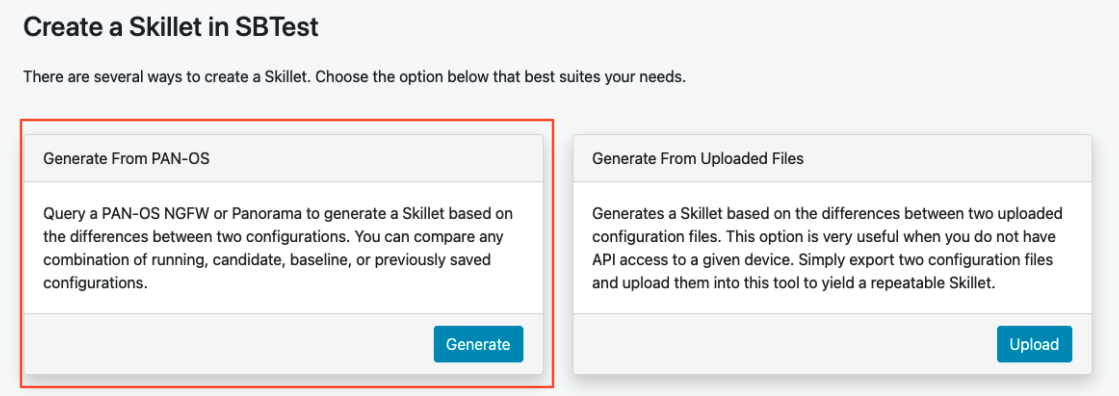
Locate the section ‘Generate From PAN-OS’ and Click ‘Generate’.
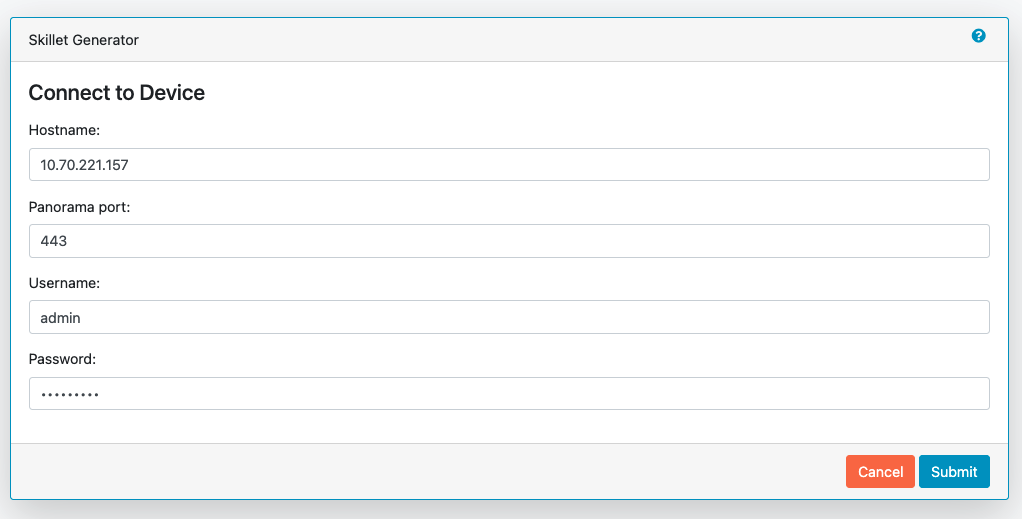
Enter in the NGFW information and click ‘Submit’. This sends an API call to the NGFW and pulls all the configuration information into PanHandler.
Choose your pre-configuration baseline file and your post-configuration file and click ‘Submit’.
Edit the Initial Config Settings for the Skillet. Here are some suggested inputs for this tutorial:
Skillet ID [must be unique]: Tutorial_Skillet_New
Skillet Label: Tutorial Skillet
Skillet Description: Skillet generated from NGFW using skillet_baseline.xml and skillet_builder.xml
Skillet Type: PAN-OS
Branch: local
Commit Message: Create New Skillet
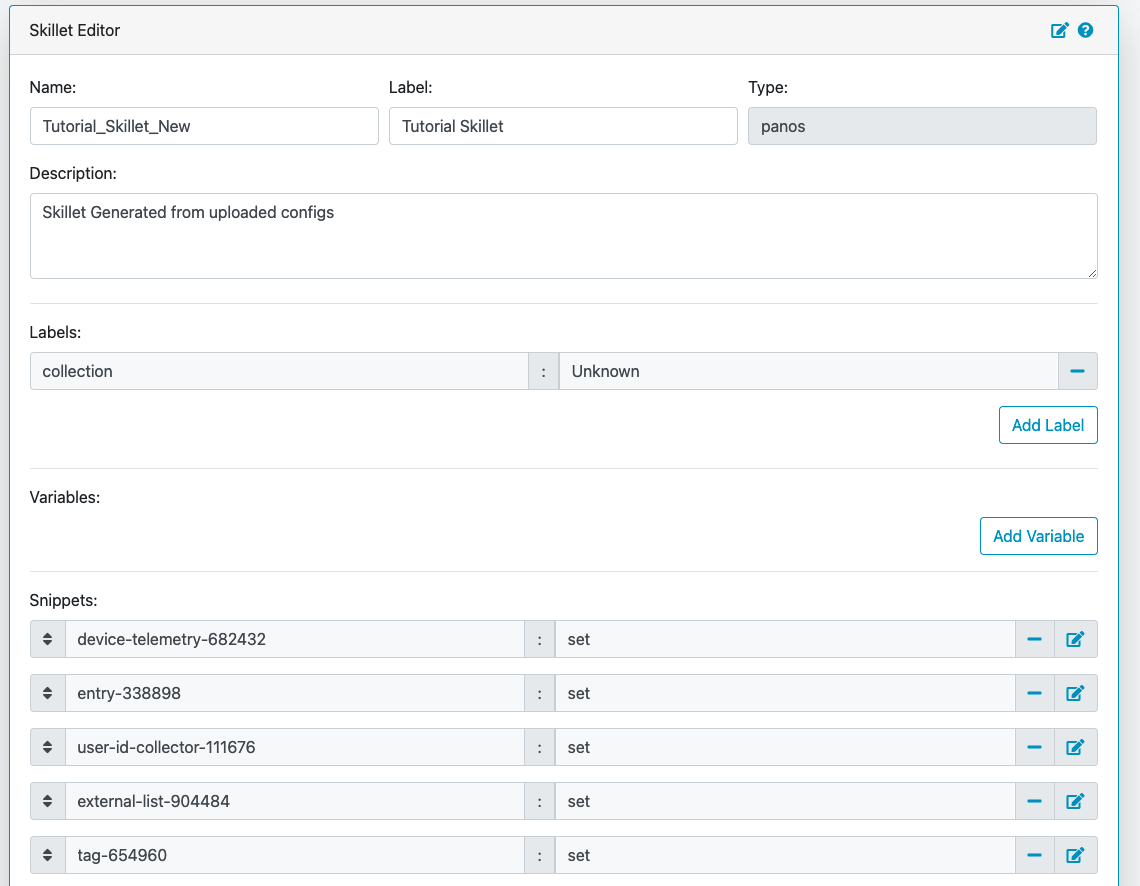
Add Variables to Snippets
During the configuration of the NGFW, you should have configured an EDL, a tag, and two security policies. Now we can utilize those parts of the configuration to add variables which allow for user input when playing the skillet.
Within the Skillet Editor, you should see the all the settings you input in the previous step. Scroll down to the ‘Snippets’ section; it should be pre-populated with snippets from the configuration files. These snippets represent the pieces of the NGFW configuration that were found to be different between the two files uploaded.
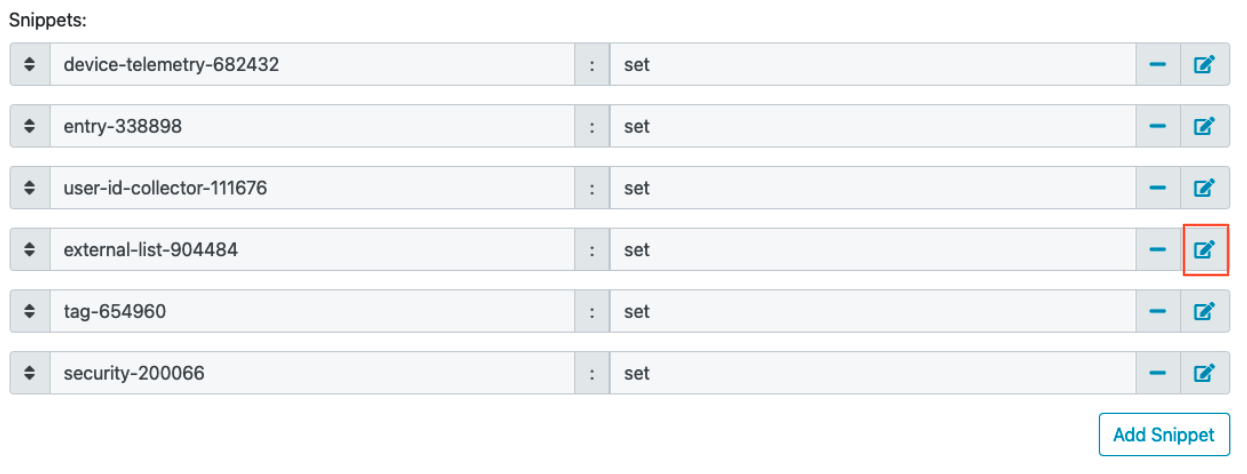
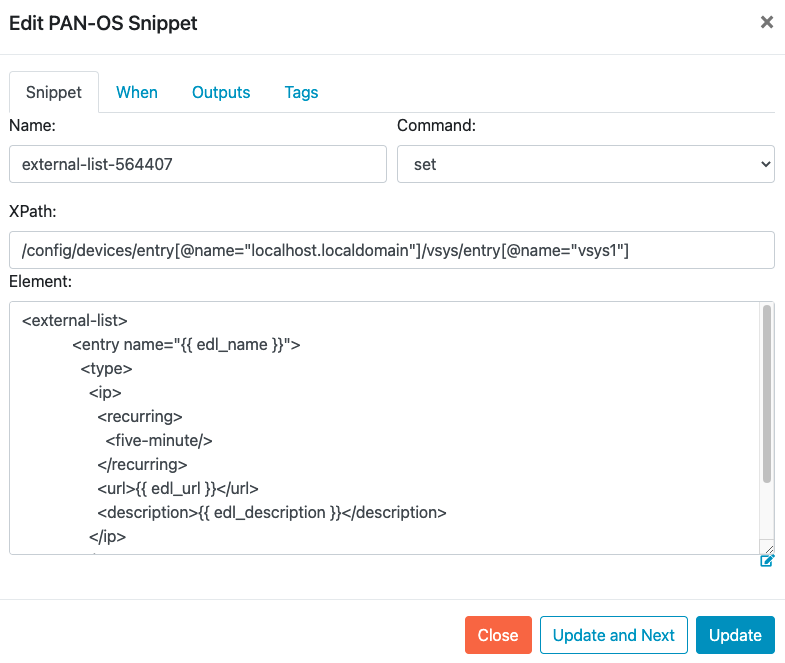
Click the ‘Edit’ button to the far right of the external-list snippet.
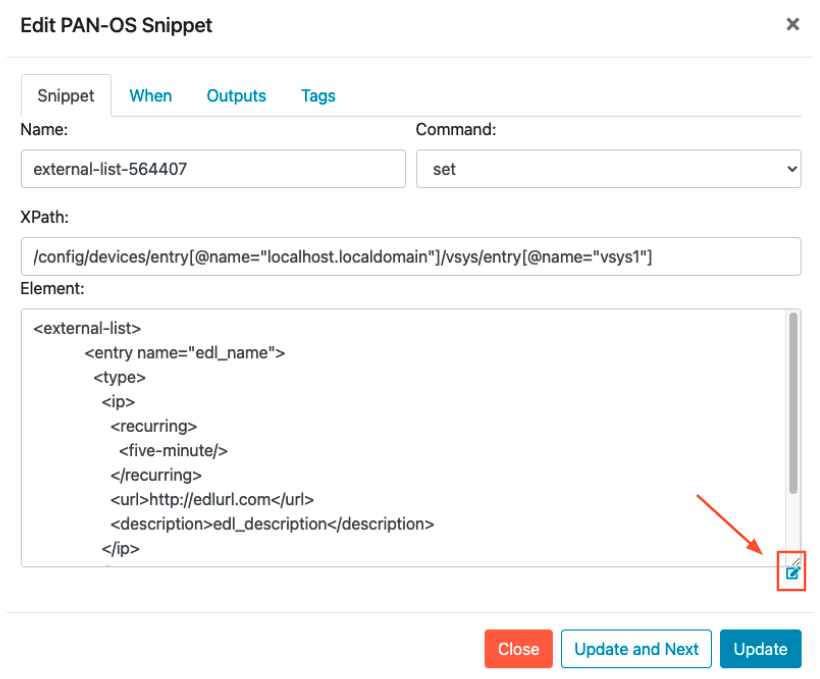
On the ‘Edit PAN-OS Snippet’ Page click the ‘Edit’ button in the bottom right corner.
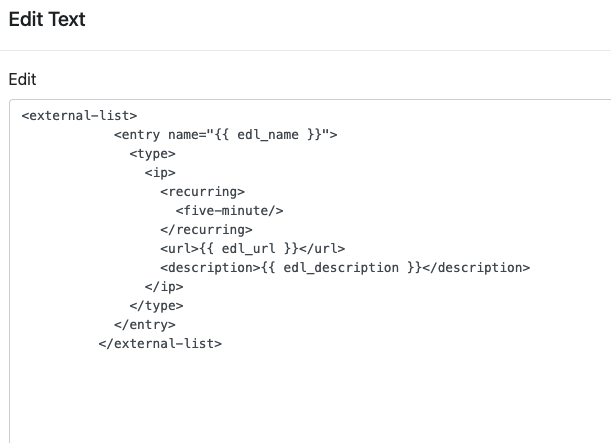
In this editor you can use the ‘Text to Replace’ feature at the bottom of the page to create the variables.

Locate the ‘entry name’ element and enter ‘edl_name’ in both text boxes at the bottom of the page. If you have different text compared to the tutorial or want to name the variable something different, you can make those changes now. Just make sure you take note of what your variables are called. It is best practice to name the variable something that is easily identifiable.

On the right side, click the replace button [seen above] to replace the text with the variable in the editor. This will change the variable to align with Jinja formatting. You should see the double set of curly brackets appear around the variable name.

In this snippet, there are a few other variables to add. Copy the contents of everything inside the ‘url’ element, paste it in the ‘Text to Replace’ section. Name the variable ‘edl_url’ and click the replace button again.

For the description element, do the same steps as above for ‘edl_description’.

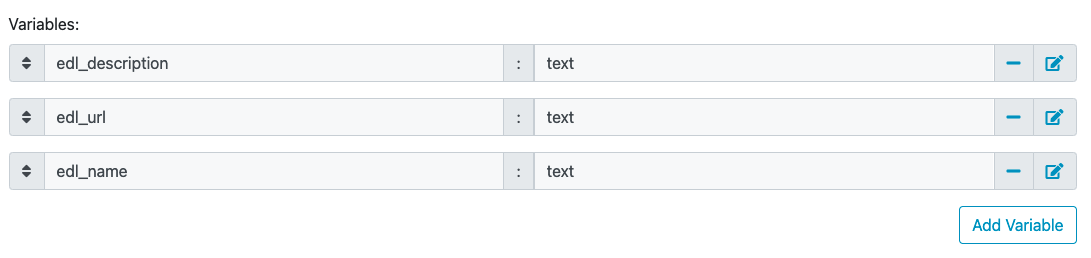
You should have three variables input into the EDL snippet at this point. Click the ‘Update’ button at the bottom right in order to save the variables.
Click ‘Update’ again in the Editor page to save the snippet edits.
In the main Skillet Editor, you should now see three variables populated in the Variables section.
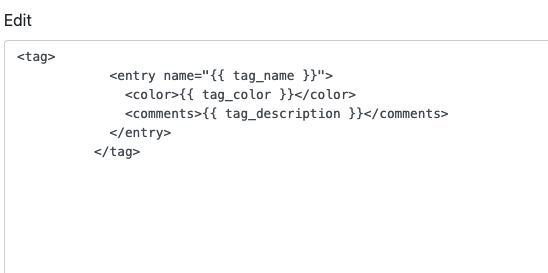
Next, locate the ‘tag’ snippet and open the editor. There are three variables to add in this section.
tag_name
tag_color
tag_description
Follow the same instructions from the previous to replace the text with the variable names.
Note
Don’t forget to click the ‘Update’ button on both pages to save your work!
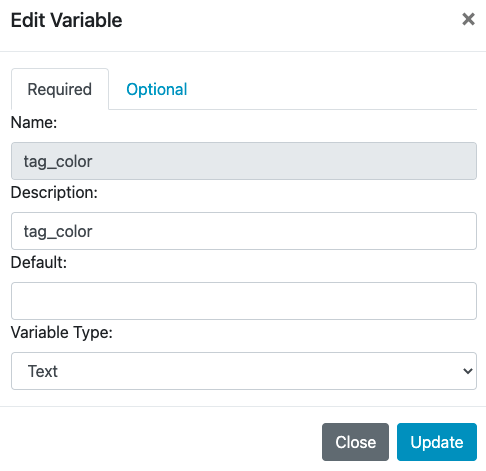
Edit Variable Types
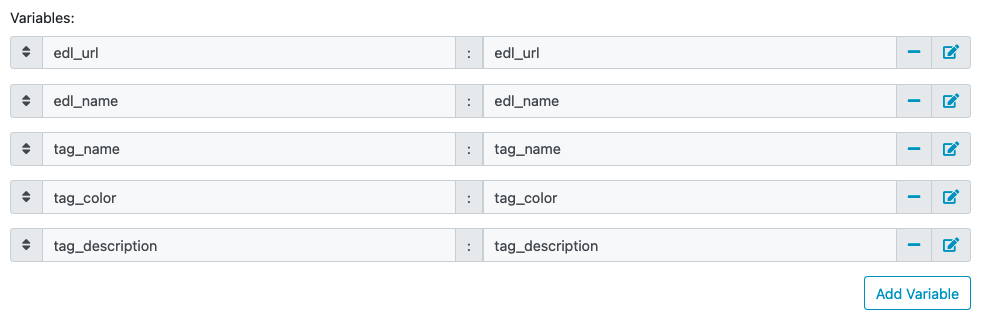
You should have 6 variables in the Variables section of the Skillet Editor. You also may notice that all of the variable types are ‘text’. This variable type works in some scenarios, but not all. For certain cases, you may want a dropdown menu, radio buttons, or only accept IP addresses/URLs/emails, etc.
We need to change the ‘tag_color’ variable to provide the user with a list of options in the form of a dropdown menu. If you noticed earlier on in the tutorial, we chose red for the tag_color in the GUI, but the color in XML was color1. A user will likely not know the number associated with the color they want, so this will make it easier.
Click the ‘Edit’ button on the right side of the tag_color variable. Under ‘Variable Type:’ select ‘Dropdown Select’. This should reveal another section of settings.
Here is a list of suggested colors associated with their number [key,value].
Tag Color Mappings
Red - color1
Green - color2
Blue - color3
Yellow - color4
Copper - color5
Orange - color6
Purple - color7
Gray - color8
Enter the key,value of the color you want and click the ‘plus’ button to add it. Add 3-6 colors and click ‘Update’.

Please refer to the Variables Page for more information on variable types.
Test and Troubleshoot
Debug
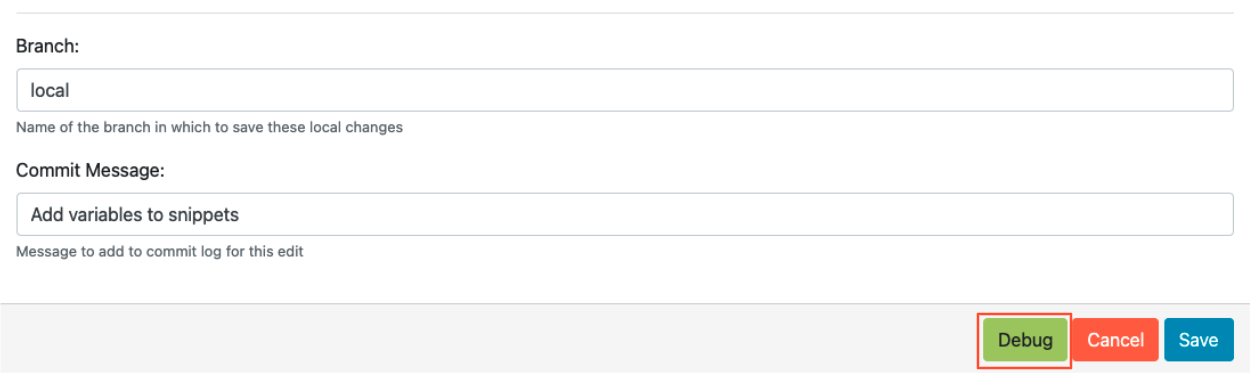
Now that all the desired changes have been made to the Skillet, it is recommended to use the Debug tool to check for errors.
At the bottom of the Skillet Editor page, click the green ‘Debug’ button.
This tool allows you to do some quick testing of the snippets to make sure they function as expected. In the ‘Context’ section, enter values based on your information:

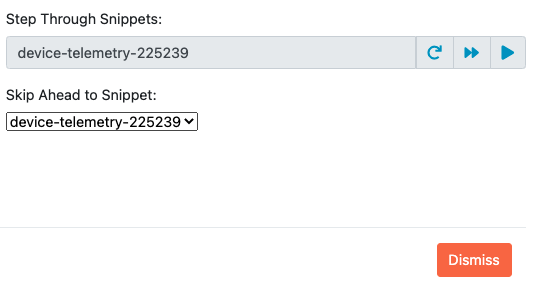
In the ‘Step Through Snippets’ section click the ‘play’ button to execute the snippet.
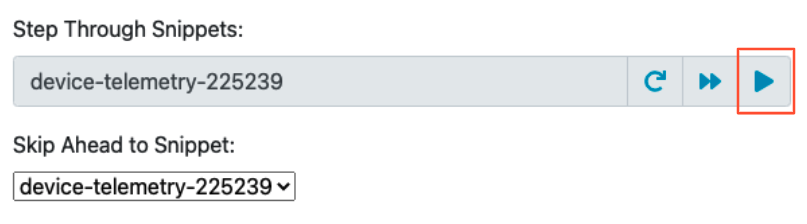
Expected output may look something like the screenshot below:
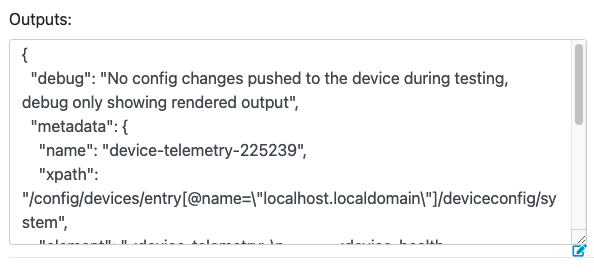
Continue to step through the snippets. If you encounter an error, be sure to check the syntax in the ‘Context’ section. Look for missing quotes ‘”’, colons ‘:’, etc.
Once you have finished debugging, click the orange ‘Dismiss’ button to close the page.
Commit and Save
The skillet is now ready to be saved and committed to PanHandler. At the bottom of the Skillet Editor, enter a relevant commit message:
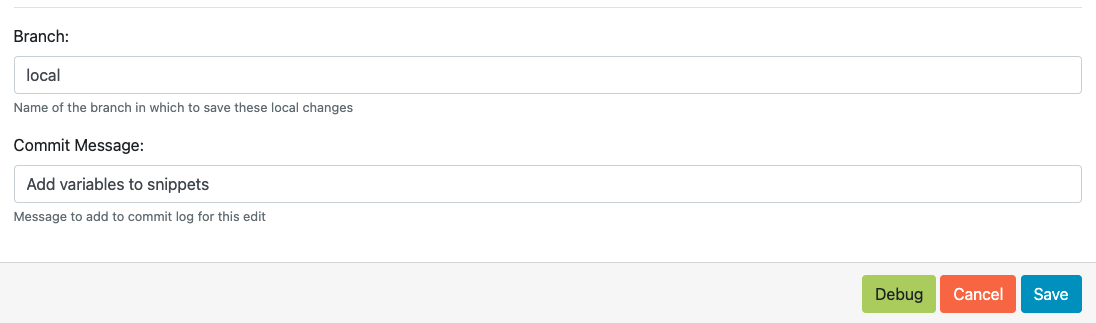
Click ‘Save’.
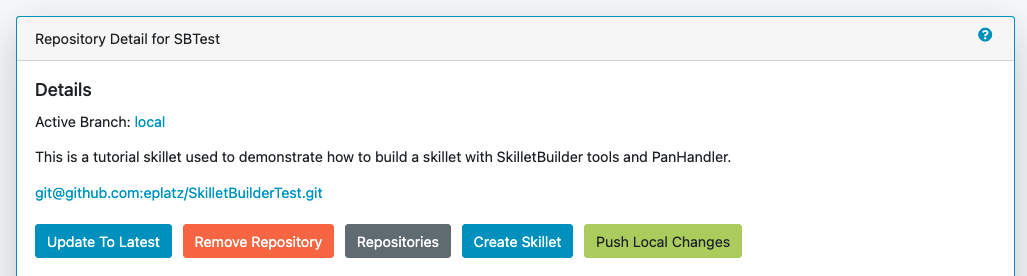
Now your skillet should show up in the ‘Skillets’ section of the Repository Details.

To push your local repository changes to GitHub, click the green ‘Push Local Changes’ button on the ‘Repository Details’ page.
Play
On the Repository Details page, click on the Skillet in the ‘Skillets’ section.

Skillet Controls Explained (from Left to Right)
Add skillet to favorites
View skillet YAML
Edit the skillet
Copy skillet contents into context
Delete the skillet

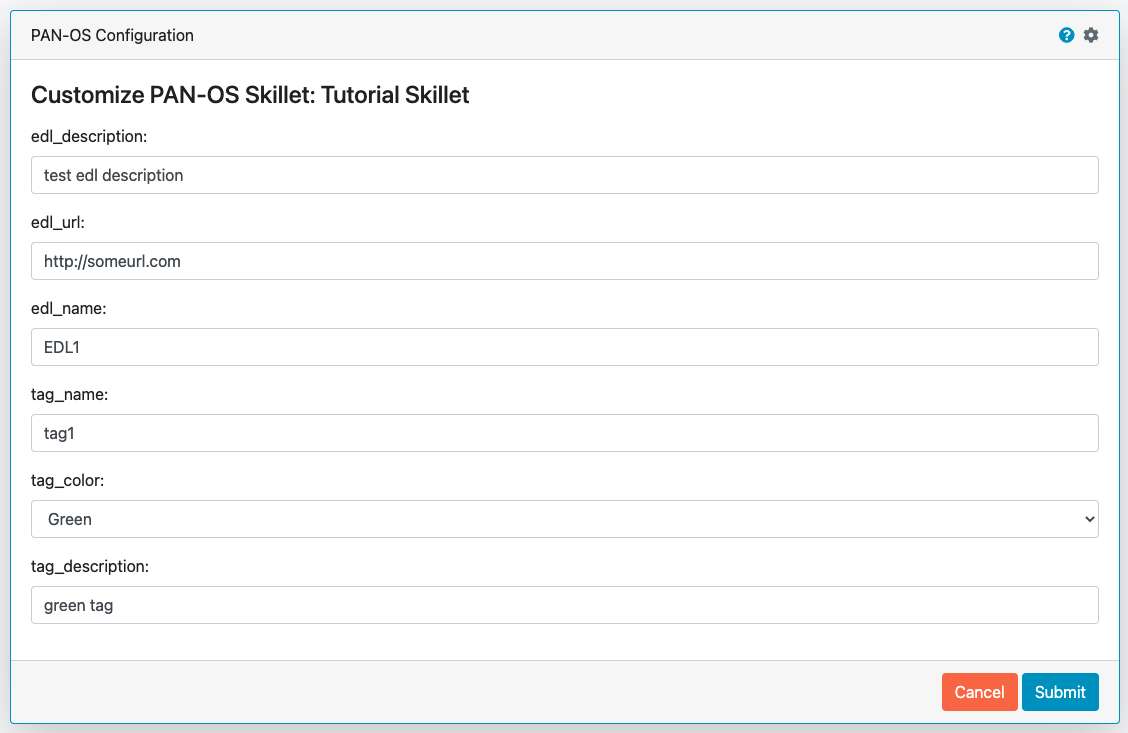
Now you should recognize all the variables that you added earlier on in the tutorial.
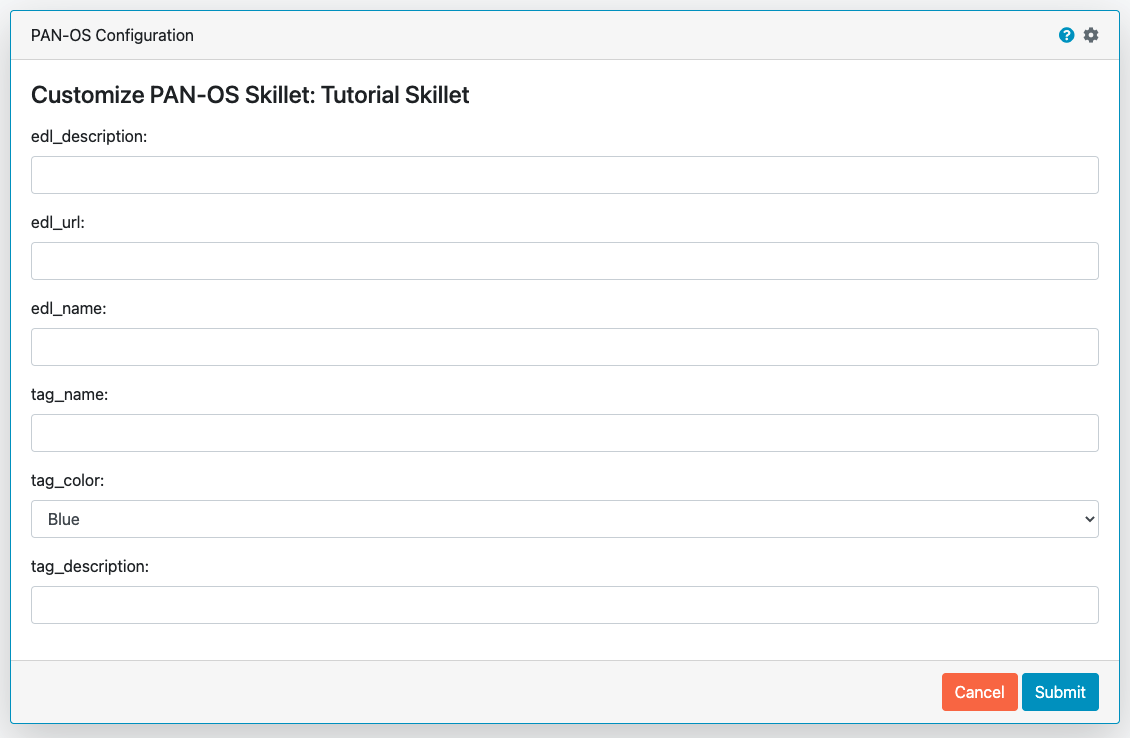
Add your desired values for the variables. Click ‘Submit’
Enter in the information for your NGFW (device to be configured). Under Commit Options, it is recommended to keep ‘Do not Commit. Push changes only’. This will save time during the testing phase.

Before clicking ‘Submit’, you can also view the ‘Debug’ page. This gives an overview of each snippet. You can check here to make sure your user inputs are correct and the XML is formatted properly.
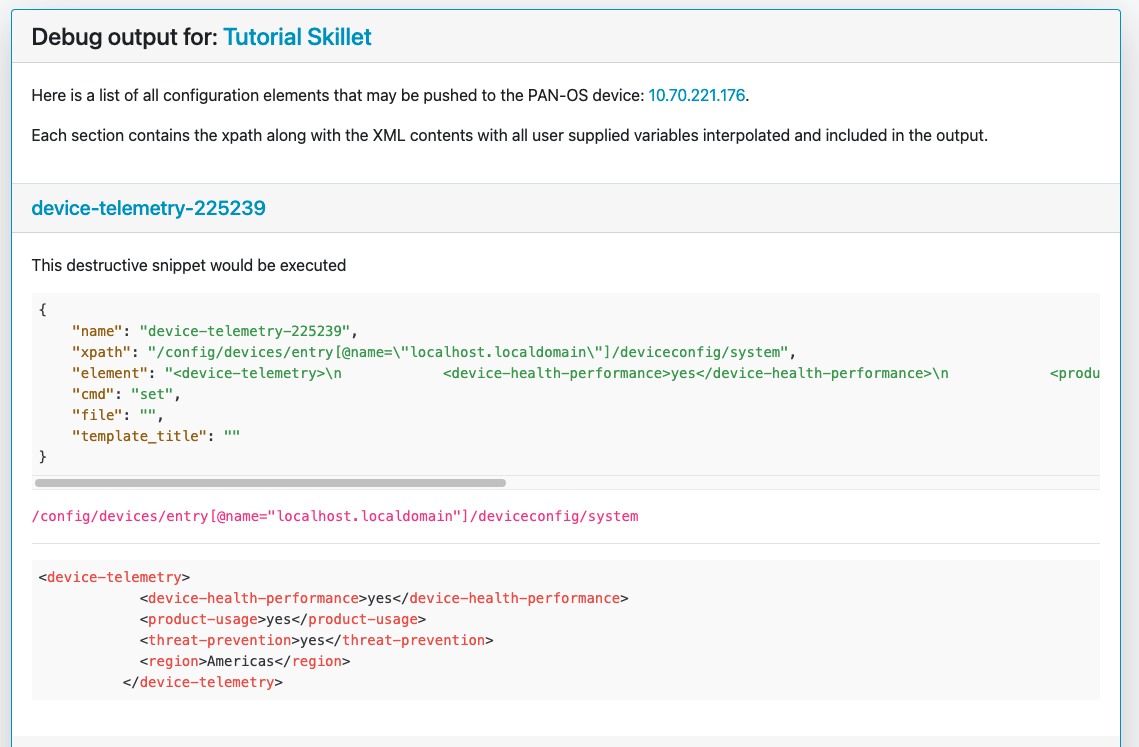
Click ‘Continue’ to exit the debugger. Click ‘Submit’ to play the Skillet. It may take between 30 seconds - 1 minute to finish. Once pushed, you should see this message:

It is recommended to also check the NGFW to make sure the changes have been pushed. Once you have confirmation that the skillet is working as expected, you can change the Commit Options to ‘Commit and wait to finish’

If you receive errors messages, common issues may be:
Snippet load order
Variable typos in the snippet section or not included in the variables section
Invalid input data that passes web form validation but not NGFW validation checks
Continue to edit, push, and test the skillet until it is free of errors and can be loaded onto the NGFW.
Document
The final stage is to document key details about the skillet to provide contextual information to the user community.
README.md
The skillet repo created has a placeholder README.md and earlier in the tutorial we created a README.md within the skillet directory. The main README gives an overview of the repo for any user viewing the page. The skillet directory README should provide skillet-specific details such as what the skillet does, variable input descriptions, and caveats and requirements.
README.md uses the markdown format. Numerous examples can be found in the skillet files. There is also a wide array of markdown cheat sheets you can find using Google searches. Below are a few common markdown elements you can use in your documentation. Most EDIs can display the user view as you edit the markdown file.
Markdown syntax options
#, ##, ### for header text levels (H1, H2, H3, etc.)
**text** for bold text
*text* or _text_ to underline
1. text to create numbered lists
* text, + text, - text for bullet style lists
[text](url) for inline web links
`test` to highlight a text string
```text block - one or more lines``` to create a highlighted text block
Tip
To view markdown edits in existing GitHub repos, click on the README.md file, then use the
Rawoption to display the output as raw markdown text. From here you can copy-paste or review formatting.Sample README.md file for the tutorial skillet. Paste into the skillet README file and push to Github. View the skillet repo to see the updated page text.
# Sample Configuration Skillet

This is used in the training material as part of the tutorial.

The skillet has 3 xml elements:

* tag: create a tag using inputs for name, description, and color
* external-list: create an edl using inputs for name, description, and url
* security policies: inbound and outbound security policies referencing the edl and tag names

## variables

* tag_name: name of a newly created tag and used in the security rules
* tag_description: text field to describe the tag
* tag_color: dropdown mapping color names to color numbers (required in the xml configuration)

* edl_name: name of the newly created external-list
* edl_description: text field used to describe the external-list
* edl_url: url used for the external-list

The 'recurring' value for the EDL is set to five-minutes. This could be added as a variable but for this example, the
value is considered a recommended practice so not configurable in the skillet.

The EDL type is set to IP since used in the security policy and is not configurable in the skillet.

## security policy referencing variables

The security policy does not have its own variables asking for rule name, zones, or actions. The rules are
hardcoded with 'any' for most attributes and action as deny to block traffic matching the EDL IP list.

The security rule names use the EDL name followed by '-in' and '-out' to create unique security policies for each
EDL. This is denoted in the yaml file with ```{{ edl_name }}``` included in the rule name.
Support Policy Text
Skillets are not part of Palo Alto Networks supported product so the policy text is appended to the README file to specify skillets are not supported. Sample text to copy/paste is found in the SkilletBuilder repo README
Live Community
Skillets can be shared in the Live community as Community or Personal skillets. Community Skillets are expected to have a higher quality of testing, documentation, and ongoing support. Personal skillets can be shared as-is to create awareness and eventually become upgraded as Community Skillets.
Click here to view the Quickplay Solutions homepage.